 diri
diri- What an agent is, and what it can touch
- How to start one and give it a task
- What to do when it asks you something
1What an agent is
An agent is an AI assistant that works directly on files on your computer. Claude Code, Codex, Cursor and Gemini are agents. You describe what you want, and the agent reads files, writes new ones, and runs the steps itself. It asks you before anything risky.
diri is where you run them. Each conversation with an agent is a session, and every session gets a row in the sidebar so you can see at a glance which ones are working and which need you.
2Install diri
Download diri, open the file, and drag diri into Applications. You need macOS 15 or newer. diri keeps itself up to date after that.
If you use Homebrew, this does the same thing:
brew install --cask cristicretu/diri/diri3Add an agent
The first time you open diri, it checks which agents are already on your Mac. If there are none, it shows a short list with an Install button next to each.
- Click Install next to the agent you want. Claude Code is a good first choice.
- diri shows the official install command it is about to run. Click Install to confirm.
- When it finishes, start the agent once and follow its sign-in steps. Each agent uses its own account, for example a Claude plan for Claude Code or a ChatGPT plan for Codex.
4Pick a folder
An agent works inside one folder. It can read and change the files in that folder, so choose it on purpose.
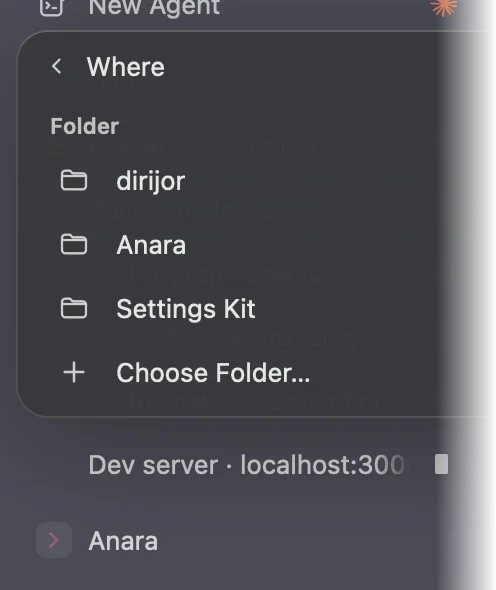
Click Choose a folder… on the welcome screen, or open New Agent in the sidebar, click the folder row at the bottom, and choose Choose Folder…. diri remembers every folder you use, so next time it is one click.
5Start the agent
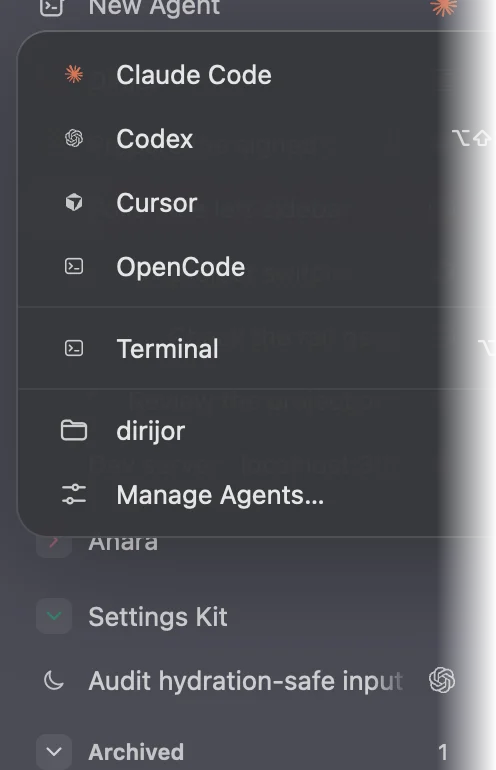
Open New Agent at the top of the sidebar and pick an agent. Or press ⌘T to start your default agent straight away.
A new session opens on the right with the agent's own screen, and a new row appears in the sidebar. You can rename it any time: double-click the row, or press ⌘R.
6Give it a task
Type what you want in plain English and press Return. Be as specific as you would be with a new colleague: what to make, where the inputs are, and where to put the result.
Read every file in this folder and write a one-page summary called summary.md. Use short headings and list any open questions at the end.
Draft three LinkedIn posts announcing our new pricing. Keep each under 120 words and save them in posts.md.
The agent shows each step as it goes: which files it read, what it is writing, what it plans next.
7When it asks you something
Before anything risky, like running a command or deleting a file, the agent stops and asks. Its row turns amber and diri sends a notification.
- Click the session, or press ⇧⌘J to jump to the next one that needs you.
- Read the question. Agents usually offer choices you pick with the arrow keys and Return.
- If you are not sure, say no and ask the agent to explain first. It will.
For a plain question (not a permission prompt), you can also answer straight from the notification banner with Reply.
8When it is done
A finished session turns green until you look at it. The agent tells you what it did, and the files are already in your folder. Open them in Finder or your usual apps.
Not happy with the result? Keep talking. "Make it shorter", "use a friendlier tone" and "undo the last change" all work.
Next, learn how diri keeps your work safe in Never lose your work.